MR CANVAS & UPHOLSTERY KEEPSAKES

Light up your keepsake.

A small twist is all it takes. Keep this guide with your keepsake.

ON: Gently twist the LED’s metal cap clockwise, stopping as soon as the light comes on.

OFF: Turn the metal cap back counterclockwise just until the light goes out.

Do not overtighten. Extra tightening makes the light difficult to turn off. The LED cap does not need to be tight for normal use.

1Top LED: twist in place

Hold the keepsake’s white top cap steady. Turn the exposed, ridged metal LED cap gently to switch the light on or off.

The top LED is a press fit. Leave it installed for everyday switching. See the reverse for removal and battery replacement.
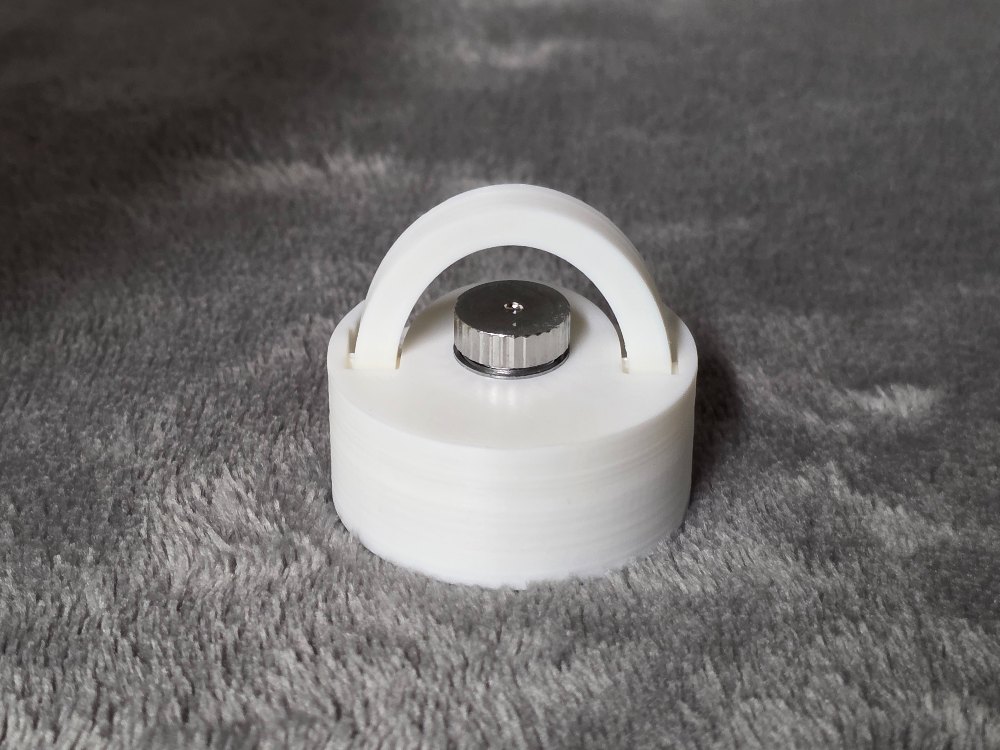
White keepsake cap with raised hanger and exposed ridged metal LED cap
Metal LED cap = twist switch.

2Bottom LED: slide, remove, twist

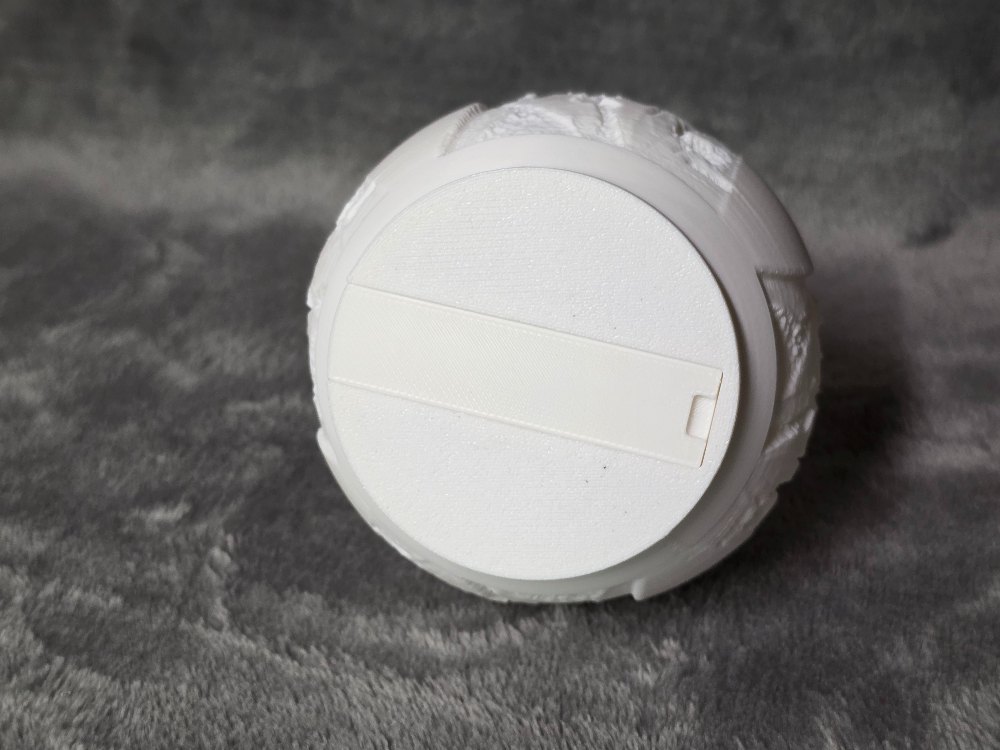
Bottom of keepsake with the flat slide closed and grip notch visible
Use the slide’s grip notch to pull it outward.
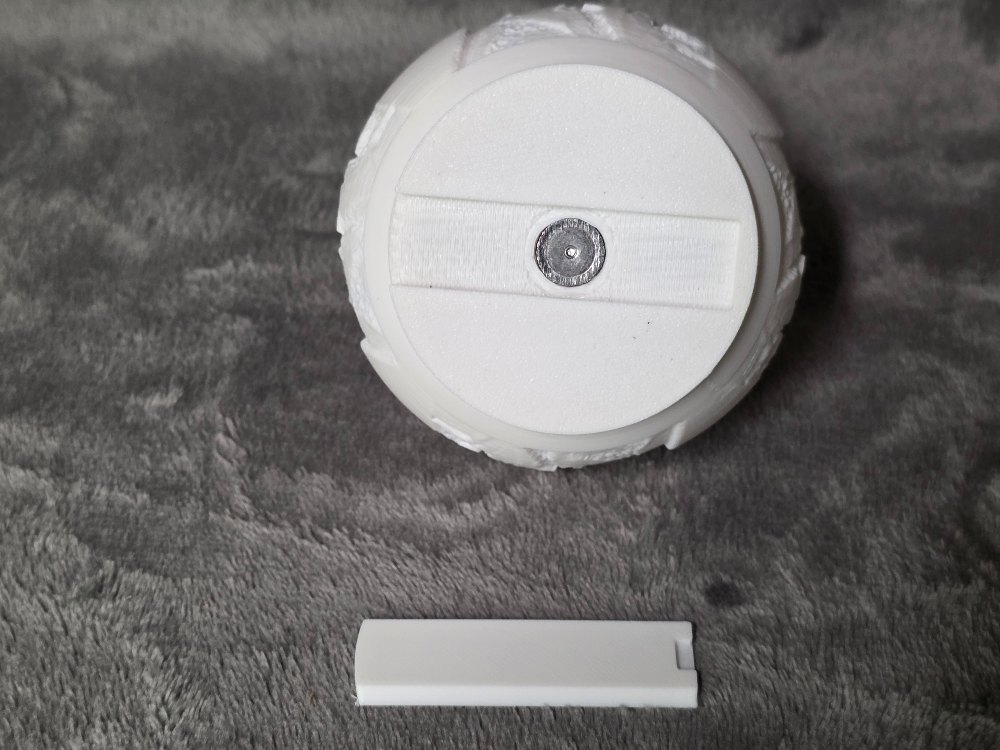
Slide removed from keepsake bottom, exposing the removable LED in its socket
Open slide: the bottom LED is accessible.
  1. Lay the keepsake on a soft cloth and support it with one hand.
  2. Catch the notch on the underside of the bottom slide with a fingernail. Pull the slide straight out along its groove. Hold a hand under the opening to catch the LED.
  3. Remove the bottom LED from its socket. A gentle tilt should let it slide into your hand.
  4. Hold the LED body and twist its metal cap just enough to turn it on—or back just enough to turn it off.
  5. Return the LED to the socket with the light-emitting end pointing inside the sphere. Support it while you slide the door fully closed. Leave the grip notch accessible underneath.


CARE & BATTERY REPLACEMENT

Keep your keepsake glowing.

3Removing the press-fit top LED

  1. Unscrew the keepsake’s white top cap from the sphere and hold it securely.
  2. For removal only: gently snug the LED’s metal cap onto the LED body so the two parts stay together. Do not wrench it tight.
  3. Place a small flat-head screwdriver in the slot on the LED’s metal cap. Gently lever the complete LED out of its press-fit pocket. Use light pressure; protect the printed cap and hanger.
  4. After servicing, press the LED straight back into its pocket, with the light-emitting end inside and the metal twist cap outside. Refit the keepsake cap, then loosen the LED’s metal cap just enough to switch it off.

4Replace all three batteries together

Each LED uses 3 × LR41 / AG3, 1.5 V alkaline button cells. Use three new, matching cells from the same pack. Do not mix old and new cells or different battery types.

  1. Remove the LED and work over a tray. Unscrew its metal cap and note the original battery orientation before taking the cells out.
  2. Put the three new cells in the same orientation as the original stack. Fit an intact insulating sleeve around the sides of all three cells. Leave the end contacts exposed.
  3. The sleeve keeps the metal sides from contacting the LED housing, which can make the light stay on or flicker. Reuse the original sleeve only if it is undamaged.
  4. If the supplied replacement tubing is loose or needs shrinking, contact us for a fitted sleeve or a ready-wrapped replacement stack. Do not apply heat to the batteries.
  5. Reinstall the sleeved stack and screw the LED cap back on. Test using only a small twist, then reinstall the LED. If it flickers or will not turn off, remove it and check the sleeve and battery orientation.
Button-cell safety: Keep new and used batteries away from children and pets. If a battery is swallowed or placed inside the body, seek immediate medical attention. Do not heat, recharge, crush or short-circuit the cells.
QR code: online LED and battery instructions

Keep this guide handy

Scan for the online LED and battery guide.

mrcanvasandupholstery.com/
lithophanes/care.html

QR code: share your keepsake photo

Show us your keepsake!

Share a photo of how you use yours. With your permission, it may appear in our customer gallery.

No names or nicknames are displayed. Submissions are reviewed.

mrcanvasandupholstery.com/
lithophanes/share.html